Playtronix
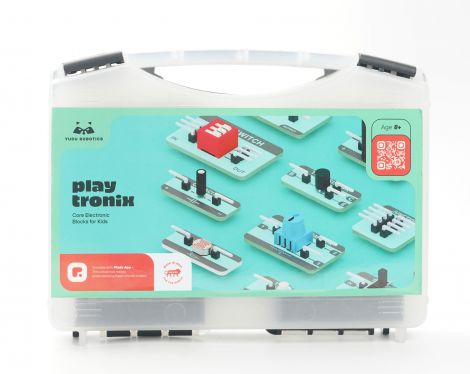
The Playtronix Kit introduces young learners to the fascinating world of electronics in a way that is simple, engaging, and hands-on. Designed especially for beginners, this kit turns basic components like LEDs, buzzers, and switches into tools for learning and creativity. With guided activities and plenty of room to experiment, Playtronix helps learners understand how circuits work and how different components interact, without the room for confusion. Whether used in a classroom or at home, it encourages exploration and builds a strong foundation in electronics, one fun project at a time.
Key Features
- Hands-On Electronics Learning
Playtronix enables foundational understanding of electronics through direct circuit-building and observation of real-time behavior.
- Intuitive Components
Every module is clearly labeled, color-coded, and designed for easy identification and quick integration into test circuits.
- Structured Guidance
Includes a comprehensive manual with component explanations, circuit diagrams, and stepwise instructions for setup and experimentation.
- Expandable Architecture
Encourages modular experimentation beyond the provided circuits. Components can be mixed and reconfigured to create new, functional variations.
- Durable and Reusable Design
All kit elements are built for repeated use across multiple builds, supporting long-term exploration, testing, and iterative learning.
What’s in the Kit?
Open the box of the Playtrons Kit and let the adventure begin! Designed for young thinkers and little tinkerers, this kit is the perfect introduction to the world of electronics and STEM. With easy-to-use components and no coding required, kids can jump right into building simple circuits and exploring how things work—all through hands-on play. The Playtrons Kit comes with everything needed to spark imagination and curiosity, laying a fun and solid foundation for early tech learning.
Hardware
The Playtronix Kit features a carefully curated collection of beginner-friendly electronic components that plug in effortlessly to form working circuits. From simple switches to dynamic motors and sensors, every piece has been selected to help young learners understand how electricity flows and how real-world devices respond to it. By experimenting with lights, sounds, motion, and controls, students get to see the logic of electronics in action—one connection at a time. Whether it’s lighting up an LED with a tact switch or adjusting brightness using a potentiometer, each build turns abstract ideas into hands-on learning. With a modular design that encourages endless tinkering, Playtronix transforms the basics of electronics into an intuitive, creative journey of discovery.
1. Power module
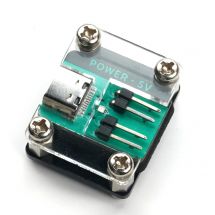
The power module supplies and manages power for the entire circuit. It often includes an on/off switch and voltage regulation. Safe, stable, and beginner-friendly, it’s the first step to powering any electronic project reliably.
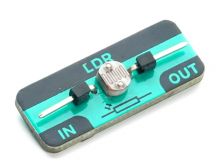
2. LDR
The LDR is a special resistor that changes its resistance based on how much light it senses. In bright light, its resistance drops; in darkness, it increases. This behavior makes it ideal for creating light-sensitive systems like automatic night lamps or daylight sensors. It introduces students to real-world sensing and basic automation concepts.
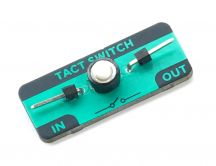
3. Tactile Switch
This is a momentary push-button that completes a circuit only while being pressed. It’s commonly found in reset buttons, calculators, and game controllers. Learners can use it to trigger events like lighting up an LED or playing a sound, making it a great way to introduce interactive inputs in circuits.
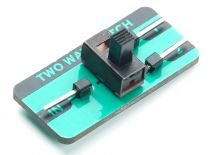
4. Two-Way Switch
This switch allows current to flow through one of two different paths. It’s used in applications like stairway lighting—where the same light can be turned on or off from two locations. It helps users understand routing and control of electrical signals.
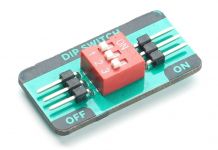
5. DIP Switch
The DIP switch is a group of tiny toggle switches bundled into one component. It lets users manually change settings like mode selection or device addresses. Common in communication setups or configurable modules, it introduces learners to hardware-level control and binary input systems.
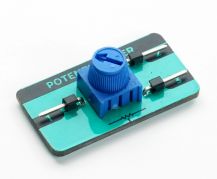
6. Potentiometer
This is a variable resistor controlled by rotating a knob. As it turns, it changes resistance, letting users adjust brightness, volume, or signal strength. It’s perfect for analog control and teaches students how inputs can vary gradually rather than just on/off.
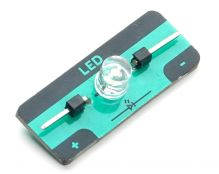
7. LED (Light Emitting Diode)
An LED lights up when electricity flows through it in the correct direction. Available in many colors and shapes, it serves as a simple and clear indicator of circuit status. It introduces the concept of polarity and offers an immediate visual output in beginner projects.
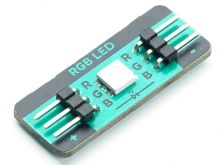
8. RGB LED
This LED combines red, green, and blue lights to create a wide range of colors. By varying the input, students can learn how mixing colors works digitally. Used in ambient lighting, indicators, and displays, this component opens the door to both coding and creative expression.
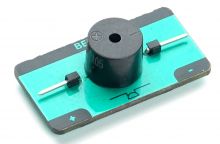
9. Beeper
Also known as a buzzer, this component produces a tone when powered. It's great for simple alarms, timers, and feedback mechanisms. It teaches users how circuits can communicate through sound, not just visuals.
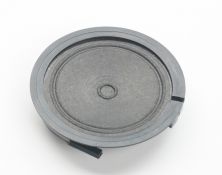
10. Speaker
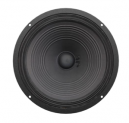
The speaker converts electric signals into sound. It can play tones, music, or recorded messages. More advanced than a beeper, it introduces students to the world of analog signals, waveforms, and audio electronics.
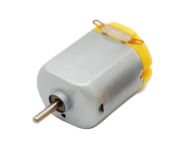
11. DC Motor
This motor turns electrical energy into mechanical rotation. It can spin wheels, fans, or even toys. By controlling its speed and direction, students learn about motion, power consumption, and mechanical design—key foundations in robotics and automation.
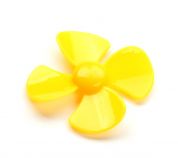
12. Propeller
When attached to a DC motor, the propeller spins and creates airflow. It’s a simple but powerful visual tool to demonstrate motion, force, and energy conversion. Often used in mini-fans or hovercrafts, it brings physical effects into electronics learning.
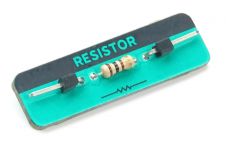
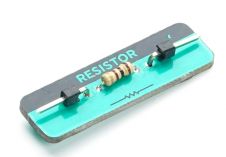
13. 100Ω Resistor
The 100Ω resistor is a low-value resistor used to limit current in simple circuits. It is commonly placed in series with LEDs or buzzers to protect them from high current. This resistor is ideal for preventing component damage in basic builds. Its color bands are brown, black, brown, and gold.
14.100kΩ Resistor
The 100kΩ resistor is a high-value resistor that restricts current much more than lower resistance types. It is often used in circuits involving sensors, timers, or audio processing, especially when creating voltage dividers or setting time delays with capacitors. Its color bands are brown, black, yellow, and gold.
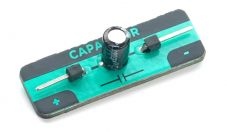
16. 100µF Capacitors
This small capacitor stores a modest amount of energy and is typically used in timing circuits, signal smoothing, or quick power bursts. It’s great for experiments that involve small delays or decoupling.
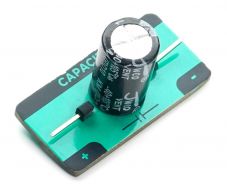
17. 1000µF Capacitors
A larger capacitor used in circuits requiring more energy storage. Perfect for power stabilization, filtering, and reducing voltage drops in motor-driven or high-load applications.
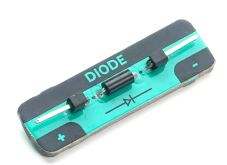
18. Diodes
Diodes let current flow in only one direction, preventing reverse flow that can damage components. They’re used in power supplies and logic circuits. Learners explore protection mechanisms and the idea of “electrical traffic rules.”
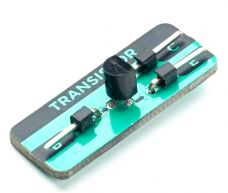
19. Transistor
These tiny but powerful components work as switches or amplifiers. They’re the backbone of modern electronics, from logic gates to audio circuits. Students can use them to control larger currents with small inputs, enabling automation and signal control.
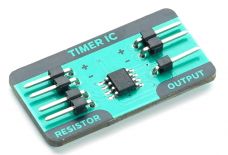
20. Timer IC (555 Timer)
The 555 timer is a famous chip used for generating time delays, pulses, or oscillations. It can blink LEDs, trigger alarms, or create sound patterns. This IC introduces learners to timing logic and how electronics can “think” in time.
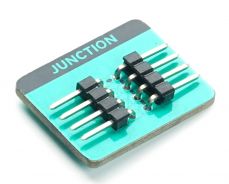
21. Junction
A junction is a connection point where wires or modules meet. It distributes signals to multiple outputs from a single input, helping build cleaner and more complex circuits. It's like an electrical crossroad for expanding designs.
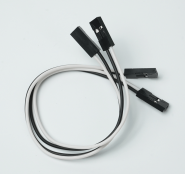
22. Jumper Cables
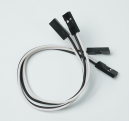
Flexible wires used to connect parts of a circuit, especially in breadboarding. They’re essential for quick experimentation and prototyping, helping learners test and revise circuits without permanent wiring.
Let me know if you’d like this turned into a printable chart, handout, wiki content, or slideshow!
Building with Playtronix
This hands-on electronics kit is packed with exciting modules that let young inventors build, learn, and play with real-world tech.
Basic Projects
Starting simple helps kids understand what each component does—and how they can bring ideas to life.
Fun with Electricity
Build an automatic night lamp using an LDR and an LED to light up your room when it gets dark.
- Learn how light sensors react to darkness—like your eyes adjusting at night!
- Watch your LED turn on automatically when the room goes dim.
- Try placing the LDR under different conditions curtains, under a table, or behind paper to see how it responds!
Art of Measurement
Use a multimeter to measure real voltage values and become a circuit scientist! Learn how measuring electricity is just as cool as building with it.
- Master the multimeter to check voltage across LEDs.
- Compare how different circuits behave with measurements.
- Combine building + testing = deeper understanding!
Color Mixer Light
Combine the RGB LED with a DIP Switch to create different light color combinations.
- Understand how mixing red, green, and blue can create new colors.
- Flip different DIP switches to try out color combinations.
- Decorate your table with your custom color light!
Advanced Projects
Once you're comfortable with the basics, move on to activities that challenge your creativity and circuit-building skills.
Multi-Tone Generator
Get musical with circuits! Use a timer IC and DIP switch to build a sound-making circuit that can play multiple tones — like your very own programmable doorbell.
- Combine a Timer IC, resistors, and a beeper to generate sound.
- Flip DIP switches to change the tone and rhythm!
- Perfect for building fun alarms or musical alerts.
Capacity Tester
Learn how to test if a capacitor is working using transistors and LEDs. This project helps you identify how healthy your electronic components are.
- Build a circuit that visually tests capacitor strength using LEDs.
- Understand how capacitors charge and discharge.
- Get a real-world glimpse into electronics maintenance and diagnostics.
Continuity Tester
Build a simple but powerful tester that beeps and lights up when it detects a complete circuit. This helps troubleshoot circuits like a pro electrician would.
- Create your own handy tool for checking connections.
- Learn about buzzers, LEDs, and how they help diagnose broken circuits.
- Customize sensitivity using a potentiometer for advanced testing.
FAQs
1. How do I power Playtronix?
Connect the USB Type-C cable to the Power Module, then plug it into your Power Bank. Switch both on, and you’re ready to play!
2. Can I test my idea before building?
Yes! Use the Playtronix Simulation Tool on your tablet or computer. Drag and connect virtual components to see how your project works before wiring it in real life.
3. Is Playtronix safe for kids?
Definitely! All modules are designed to be child-safe and low-voltage. Just make sure an adult supervises and avoid using damaged cables
