Roboki - Session 13: Difference between revisions
Evobi admin (talk | contribs) mNo edit summary |
Evobi admin (talk | contribs) mNo edit summary |
||
| Line 1: | Line 1: | ||
= '''Building the | ='''Building the Object Finder bot Step-by-Step'''= | ||
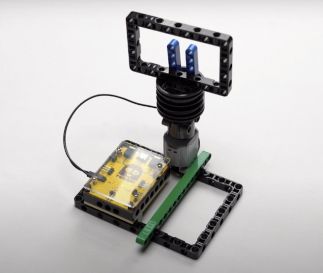
[[File:Object finder bot using Roboki setup tutorial.jpg|thumb|323x323px|Object finder bot made using Roboki utilising advanced AI recognition to detect object.]] | |||
======'''Description :'''====== | |||
[[File: | Let's Create an AI-powered Object Finder Robot! Using the Roboki microcontroller and a motor, we'll craft a smart robot that can detect and identify objects with advanced AI recognition. We will Program it to recognise a variety of items and step into the thrilling world of AI-driven robotics. Perfect for young engineers and engineering enthusiasts, this project is a gateway to mastering robotics and diving deep into STEM learning. | ||
{| class="wikitable" | {| class="wikitable" | ||
|+ | |||
|'''<u>Contents</u> :''' | |'''<u>Contents</u> :''' | ||
'''1. HARDWARE''' | '''1. HARDWARE''' | ||
* Let's Make it! | *Let's Make it!*1.1 What do we need ? | ||
*1.1 What do we need ? | |||
*1.2 How is it Made ? | *1.2 How is it Made ? | ||
'''2. SOFTWARE''' | '''2. SOFTWARE''' | ||
*2.1 Let's Code it ! | *2.1 Let's Code it ! | ||
'''3. WHAT NEXT?'''*Challenge! | '''3. WHAT NEXT?'''*Challenge! | ||
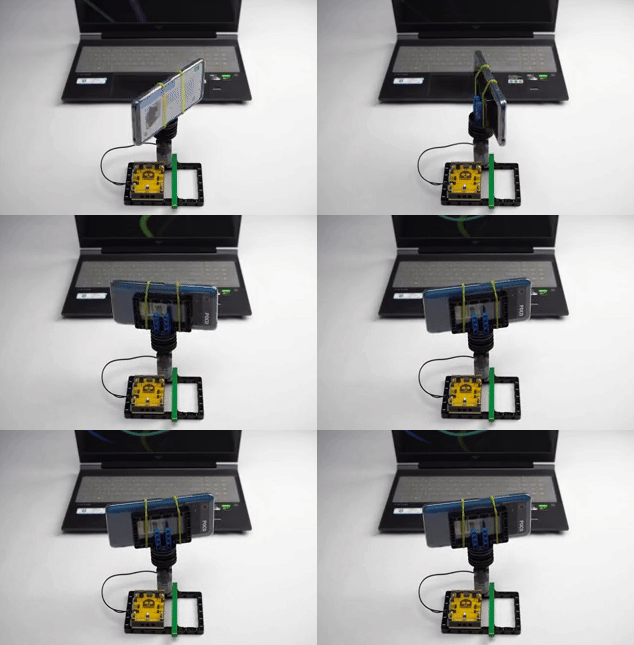
|} | |}[[File:Object finder in action..gif|thumb|317x317px|Object finder made using Roboki and AI mode detecting a Laptop.]]Before we begin, take a look at the picture of the bot to get a better understanding of the different parts of this object finder bot. | ||
[[File: | =='''1.HARDWARE'''== | ||
===Let's make it!=== | |||
We are going to follow the steps in this tutorial to assemble our object finder bot. Look carefully into each of the images and follow the instructions one by one to make this wall follower bot. The colour of the blocks and parts used in the construction might differ from original, So carefully follow the instruction given below. | |||
Before we begin, take a look at the picture of the bot to get a better understanding of different parts of this | ===<big>1.1 What do we need ?</big>=== | ||
Given below are the materials required to build the object finder bot.[[File:Components required.jpg|frameless|742x742px]] | |||
== '''1. HARDWARE''' == | ===<big>1.2 How is it made ?</big>=== | ||
====Follow the steps carefully to build the Object Finder Robot ==== | |||
=== Let's make it! === | 1. Place the 15 by 11 block on a flat surface. | ||
We are going to follow the steps in this tutorial to assemble our | |||
=== | |||
Given below are the materials required to build the | |||
[[File: | |||
=== | |||
==== Follow the steps carefully to build the | |||
1 | |||
[[File:Beam 15 on surface.jpg|link=https://wiki.yudurobotics.com/File:Beam%2015%20on%20surface.jpg|frameless|438x438px]] | |||
2. Take a Beam 15 and attach two 90-degree pegs to the second and second-to-last holes of the beam as shown in the image. Then, connect the beam to the block. | |||
[[File:Beam 15 with pegs.jpg|link=https://wiki.yudurobotics.com/File:Beam%2015%20with%20pegs.jpg|frameless|449x449px]] | |||
3. Take a motor and attach 4 pegs as shown below. | |||
[[File:Motor with pegs .jpg|link=https://wiki.yudurobotics.com/File:Motor%20with%20pegs%20.jpg|frameless|446x446px]] | |||
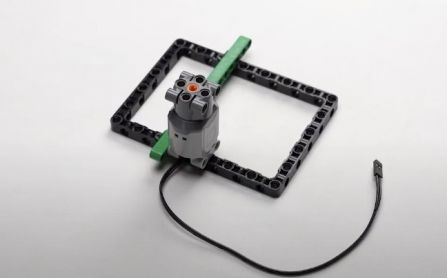
4. Connect the motor to this block and beam as shown in the image. | |||
[[File:Motor attached on block.jpg|link=https://wiki.yudurobotics.com/File:Motor%20attached%20on%20block.jpg|frameless|447x447px]] | |||
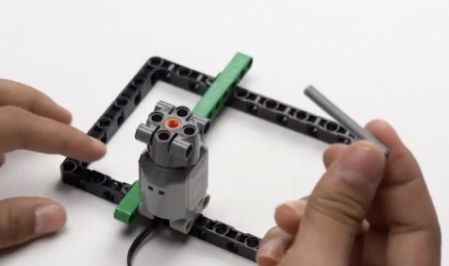
5. Once the setup is ready carefully attach axle 5 to the motor. With this we will be creating an extension to mount the Mobile holder. | |||
[[File:Axle on motor.jpg|link=https://wiki.yudurobotics.com/File:Axle%20on%20motor.jpg|frameless|449x449px]] | |||
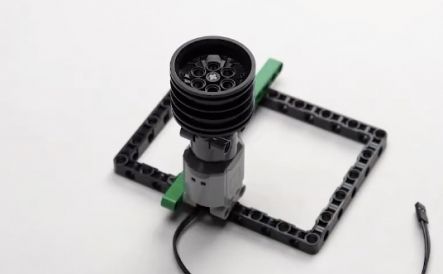
6. Take a 55 mm rim and slide it onto the axle, as shown in the image. | |||
[[File:When rim on axle+motor.jpg|link=https://wiki.yudurobotics.com/File:When%20rim%20on%20axle+motor.jpg|frameless|443x443px]] | |||
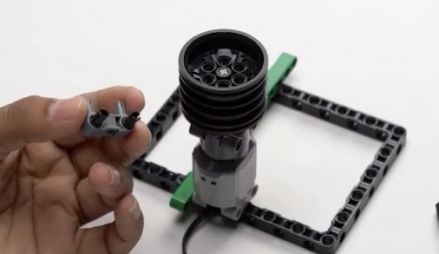
7. Take a pin connector and attach two pegs to it. | |||
[[File: | [[File:Pin connector with pegs.jpg|link=https://wiki.yudurobotics.com/File:Pin%20connector%20with%20pegs.jpg|frameless|439x439px]] | ||
8. Take a Beam 5 and attach the first hole of the beam to the first peg on the pin connector.[[File:Beam 5 on pin connector1.jpg|link=https://wiki.yudurobotics.com/File:Beam%205%20on%20pin%20connector1.jpg|right|frameless|412x412px]][[File:Beam 5 on pin connector.jpg|link=https://wiki.yudurobotics.com/File:Beam%205%20on%20pin%20connector.jpg|frameless|412x412px]] | |||
9. Similarly, take another Beam 5 and attach the first hole of the beam to the second peg on the pin connector. Then, fix the pin connector onto the rim on the axle, as shown in the image. | |||
[[File:Beam 5 on pin connector2.jpg|link=https://wiki.yudurobotics.com/File:Beam%205%20on%20pin%20connector2.jpg|frameless|416x416px]] | |||
10. Take an 11 by 7 block and attach two pegs to it, as shown. | |||
[[File:Block added to beam5.jpg|link=https://wiki.yudurobotics.com/File:Block%20added%20to%20beam5.jpg|frameless|410x410px]] | |||
11. Fix the 11 by 7 block onto the pin connector. With this construction, we have built a mobile holder mounted on a motor. | |||
= | [[File:Block attached to beam5.jpg|link=https://wiki.yudurobotics.com/File:Block%20attached%20to%20beam5.jpg|frameless|413x413px]] | ||
12. Take the 1 by 6 brick with holes and connect two pegs to it and then attach it to the 15 by 11 Block as shown in the image. | |||
[[File:Brick attached to block 15 by 11.jpg|link=https://wiki.yudurobotics.com/File:Brick%20attached%20to%20block%2015%20by%2011.jpg|frameless|412x412px]] | |||
13. Next, connect the Roboki on top of the 1 by 6 brick. | |||
[[File:Roboki attached to brick.jpg|link=https://wiki.yudurobotics.com/File:Roboki%20attached%20to%20brick.jpg|frameless|411x411px]] | |||
== ''' | 14. Now, connect the motor to the Roboki. Make a note of the port to which the motor is connected and program it accordingly. (Refer to Activity 4 "Spin Wheel.")[[File:Motors being connected to object finder bot.gif|center|frameless|411x411px]]15.All that is left is to attach our Mobile on the bot for using its camera to detect objects using our AI app mode in PLODE. So for that, we will take two rubber bands and add it to the mobile and mount the mobile to this block as shown below. During this step, make sure to support the body of the bot from the side, so as to not break the structure. [[File:Fixing mobile onto the object finder bot .gif|center|frameless|411x411px]] | ||
=='''2. SOFTWARE'''== | |||
===2.1 Let's Code it !=== | |||
Now that our Bot is ready, we need to programme it using Plode to make a wall-following robot.Follow the step by step instruction in the video given below to programme the object finder bot. | |||
=== Challenge ! === | ==3. What Next?== | ||
Create | ===Challenge!=== | ||
Create a robot capable of detecting a red ball, moving towards it, and accurately hitting it towards a specified target. | |||
Revision as of 12:08, 12 September 2024
Building the Object Finder bot Step-by-Step
Description :
Let's Create an AI-powered Object Finder Robot! Using the Roboki microcontroller and a motor, we'll craft a smart robot that can detect and identify objects with advanced AI recognition. We will Program it to recognise a variety of items and step into the thrilling world of AI-driven robotics. Perfect for young engineers and engineering enthusiasts, this project is a gateway to mastering robotics and diving deep into STEM learning.
| Contents :
1. HARDWARE
2. SOFTWARE
3. WHAT NEXT?*Challenge! |
Before we begin, take a look at the picture of the bot to get a better understanding of the different parts of this object finder bot.
1.HARDWARE
Let's make it!
We are going to follow the steps in this tutorial to assemble our object finder bot. Look carefully into each of the images and follow the instructions one by one to make this wall follower bot. The colour of the blocks and parts used in the construction might differ from original, So carefully follow the instruction given below.
1.1 What do we need ?
Given below are the materials required to build the object finder bot.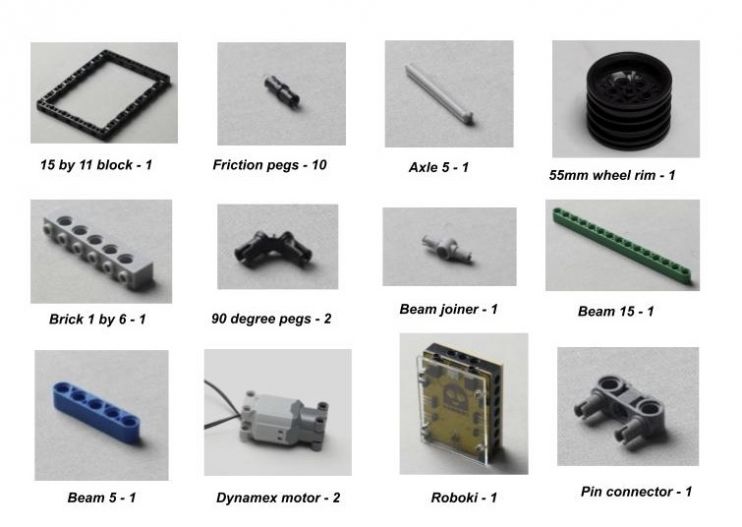
1.2 How is it made ?
Follow the steps carefully to build the Object Finder Robot
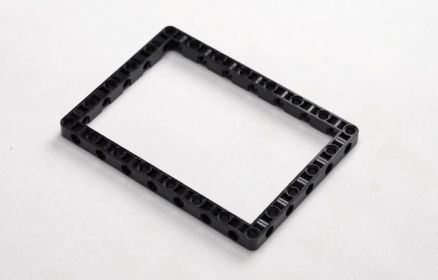
1. Place the 15 by 11 block on a flat surface.
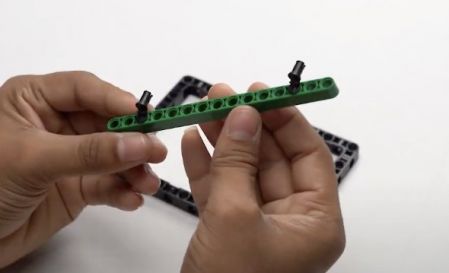
2. Take a Beam 15 and attach two 90-degree pegs to the second and second-to-last holes of the beam as shown in the image. Then, connect the beam to the block.
3. Take a motor and attach 4 pegs as shown below.
4. Connect the motor to this block and beam as shown in the image.
5. Once the setup is ready carefully attach axle 5 to the motor. With this we will be creating an extension to mount the Mobile holder.
6. Take a 55 mm rim and slide it onto the axle, as shown in the image.
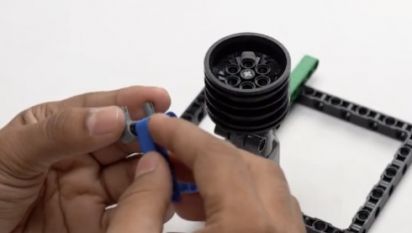
7. Take a pin connector and attach two pegs to it.
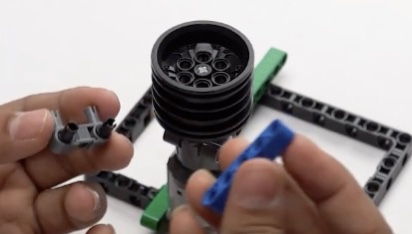
8. Take a Beam 5 and attach the first hole of the beam to the first peg on the pin connector.
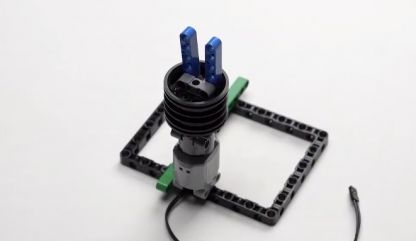
9. Similarly, take another Beam 5 and attach the first hole of the beam to the second peg on the pin connector. Then, fix the pin connector onto the rim on the axle, as shown in the image.
10. Take an 11 by 7 block and attach two pegs to it, as shown.
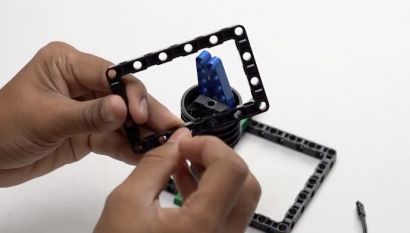
11. Fix the 11 by 7 block onto the pin connector. With this construction, we have built a mobile holder mounted on a motor.
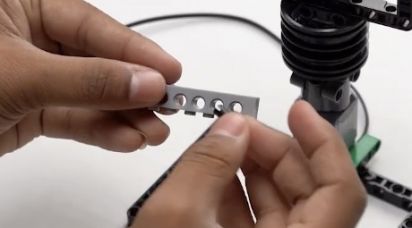
12. Take the 1 by 6 brick with holes and connect two pegs to it and then attach it to the 15 by 11 Block as shown in the image.
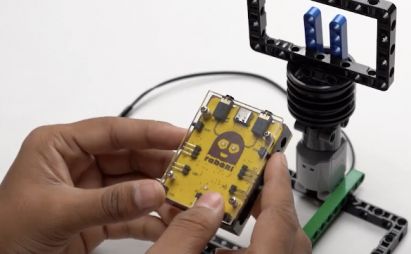
13. Next, connect the Roboki on top of the 1 by 6 brick.
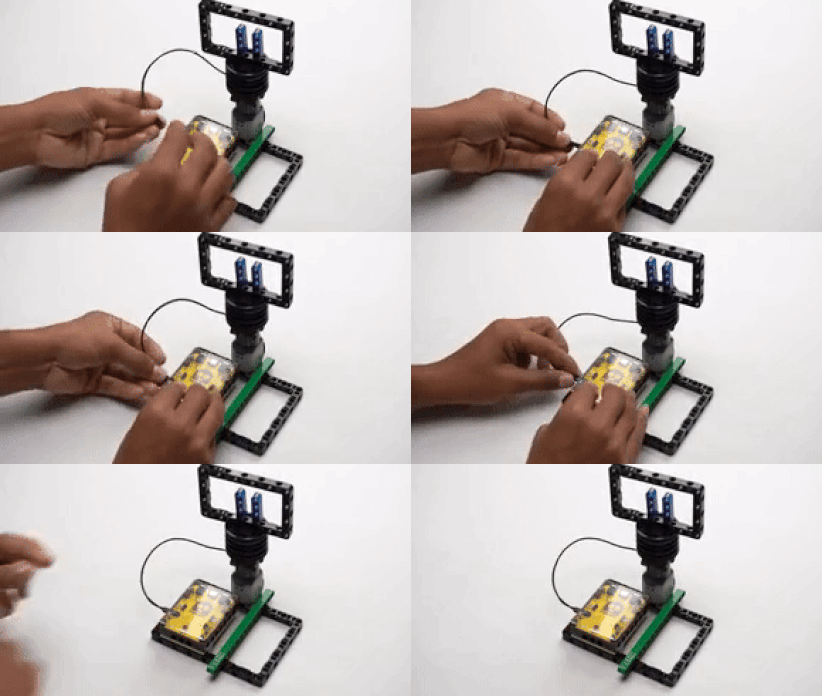
14. Now, connect the motor to the Roboki. Make a note of the port to which the motor is connected and program it accordingly. (Refer to Activity 4 "Spin Wheel.")
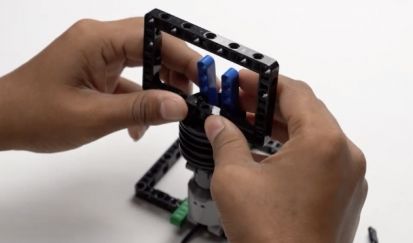
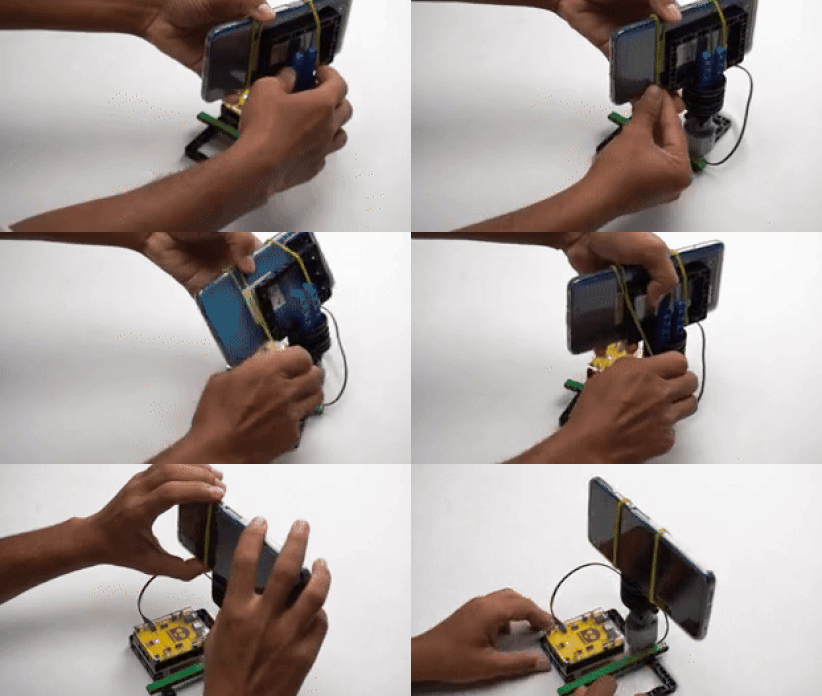
15.All that is left is to attach our Mobile on the bot for using its camera to detect objects using our AI app mode in PLODE. So for that, we will take two rubber bands and add it to the mobile and mount the mobile to this block as shown below. During this step, make sure to support the body of the bot from the side, so as to not break the structure.
2. SOFTWARE
2.1 Let's Code it !
Now that our Bot is ready, we need to programme it using Plode to make a wall-following robot.Follow the step by step instruction in the video given below to programme the object finder bot.
3. What Next?
Challenge!
Create a robot capable of detecting a red ball, moving towards it, and accurately hitting it towards a specified target.
