Playtrons: Difference between revisions
Evobi admin (talk | contribs) mNo edit summary |
Evobi admin (talk | contribs) No edit summary |
||
| Line 207: | Line 207: | ||
== 1. Power module == | == 1. Power module == | ||
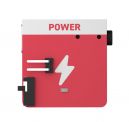
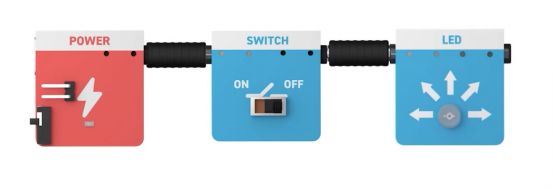
The power module is the heart of every project—it distributes energy to all connected components. It ensures safe and stable voltage, so kids can experiment without any worry. Just plug it in, and the fun begins. | The power module is the heart of every project—it distributes energy to all connected components. It ensures safe and stable voltage, so kids can experiment without any worry. Just plug it in, and the fun begins. | ||
[[File:Tact switch.jpg|thumb|180x180px|Tact Switch]] | |||
== 2. Tact Switch == | == 2. Tact Switch == | ||
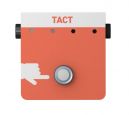
This small button sends a quick signal only when pressed, making it great for creating reactions like lighting an LED or sounding a beep. It's perfect for introducing kids to momentary input controls. Tap, trigger, and see what happens. | This small button sends a quick signal only when pressed, making it great for creating reactions like lighting an LED or sounding a beep. It's perfect for introducing kids to momentary input controls. Tap, trigger, and see what happens. | ||
[[File:Switch 3.jpg|thumb|180x180px|Switch]] | |||
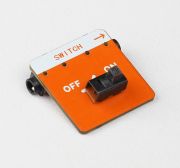
== 3. Switch == | == 3. Switch == | ||
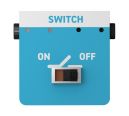
Unlike the tact switch, this one stays on or off until you flip it again. It teaches children about persistent states in a circuit. Ideal for simple on/off functions and power control in mini-projects. | Unlike the tact switch, this one stays on or off until you flip it again. It teaches children about persistent states in a circuit. Ideal for simple on/off functions and power control in mini-projects. | ||
[[File:LED module.jpg|thumb|180x180px|LED Module]] | |||
| Line 225: | Line 240: | ||
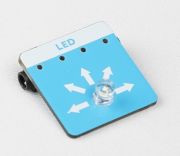
== 4. LED == | == 4. LED == | ||
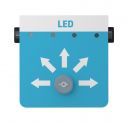
The LED lights up when powered, making it a super satisfying and visual way to show electricity flowing. Kids can experiment with using LEDs as indicators or alerts. It’s bright, safe, and fun to use. | The LED lights up when powered, making it a super satisfying and visual way to show electricity flowing. Kids can experiment with using LEDs as indicators or alerts. It’s bright, safe, and fun to use. | ||
[[File:Junction Module.jpg|thumb|180x180px|Junction Module]] | |||
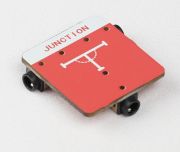
== 5. Junction == | == 5. Junction == | ||
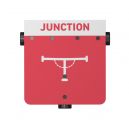
The junction is like a traffic circle for signals—it lets multiple wires or components connect to the same point. It allows more complex designs where one input controls several outputs. Think of it as a teamwork hub for electronics. | The junction is like a traffic circle for signals—it lets multiple wires or components connect to the same point. It allows more complex designs where one input controls several outputs. Think of it as a teamwork hub for electronics. | ||
[[File:Beeper Module.jpg|thumb|180x180px|Beeper Module]] | |||
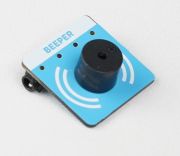
== 6. Beeper == | == 6. Beeper == | ||
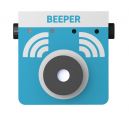
This component emits a sound when triggered, which makes it great for alerts or interactive feedback. It’s a great way to make projects feel alive with audio responses. A buzz here and a beep there adds excitement. | This component emits a sound when triggered, which makes it great for alerts or interactive feedback. It’s a great way to make projects feel alive with audio responses. A buzz here and a beep there adds excitement. | ||
[[File:Counter Module .jpg|thumb|180x180px|Counter Module ]] | |||
== 7. Counter == | == 7. Counter == | ||
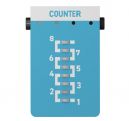
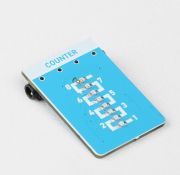
The counter keeps track of how many times an event occurs, like a button press or sensor trigger. It's perfect for teaching the basics of event tracking and simple memory in electronics. Count, build, and measure behavior over time. | The counter keeps track of how many times an event occurs, like a button press or sensor trigger. It's perfect for teaching the basics of event tracking and simple memory in electronics. Count, build, and measure behavior over time. | ||
[[File:Graph Module 1.jpg|thumb|180x180px|Graph Module]] | |||
| Line 256: | Line 290: | ||
== 8. Graph == | == 8. Graph == | ||
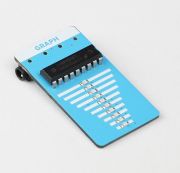
The graph module visually shows sensor data in a simplified form. It helps kids “see” changes in temperature, light, or proximity. A brilliant way to introduce data visualization without a screen. | The graph module visually shows sensor data in a simplified form. It helps kids “see” changes in temperature, light, or proximity. A brilliant way to introduce data visualization without a screen. | ||
[[File:Greater than Module.jpg|thumb|180x180px|Greater than Module]] | [[File:Greater than Module.jpg|thumb|180x180px|Greater than Module]] | ||
| Line 267: | Line 305: | ||
== 9. Greater Than Condition Module == | == 9. Greater Than Condition Module == | ||
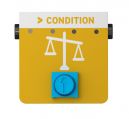
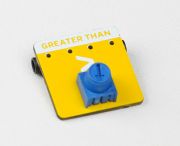
This smart module activates an output only when a sensor reading is greater than a set value. It’s a fun intro to logical comparisons—like “if it’s hotter than 30°C, turn the fan on.” Kids start thinking like engineers. | This smart module activates an output only when a sensor reading is greater than a set value. It’s a fun intro to logical comparisons—like “if it’s hotter than 30°C, turn the fan on.” Kids start thinking like engineers. | ||
[[File:Less Than Module.jpg|thumb|180x180px|Less than Module]] | |||
== 10. Less Than Condition Module == | == 10. Less Than Condition Module == | ||
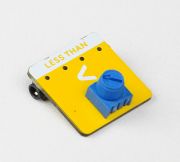
The opposite of the greater-than module, this one triggers when a reading is less than a chosen threshold. Great for projects like “if it's dark, turn the light on.” It encourages critical thinking and rule-based logic. | The opposite of the greater-than module, this one triggers when a reading is less than a chosen threshold. Great for projects like “if it's dark, turn the light on.” It encourages critical thinking and rule-based logic. | ||
[[File:Light sensor 1.jpg|thumb|180x180px]] | |||
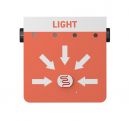
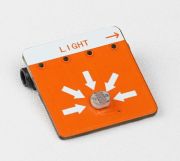
== 11. Light Sensor == | == 11. Light Sensor == | ||
This sensor detects brightness levels. Kids can build light-activated projects, like automatic nightlights. It helps them understand how devices respond to the environment—like eyes for your circuits. | This sensor detects brightness levels. Kids can build light-activated projects, like automatic nightlights. It helps them understand how devices respond to the environment—like eyes for your circuits. | ||
[[File:Temperature Sensor 2.jpg|thumb|180x180px]] | |||
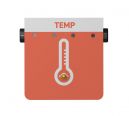
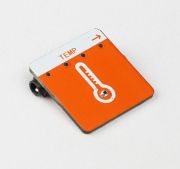
== 12. Temperature Sensor == | == 12. Temperature Sensor == | ||
This sensor reads heat levels and lets learners build temperature-sensitive projects. It can be used for everything from “hot or cold” experiments to triggering fans or beepers. A cool way to learn about warm things. | This sensor reads heat levels and lets learners build temperature-sensitive projects. It can be used for everything from “hot or cold” experiments to triggering fans or beepers. A cool way to learn about warm things. | ||
[[File:Magnetic Sensor 2.jpg|alt=Magnetic Sensor|thumb|180x180px|Magnetic Sensor]] | |||
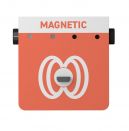
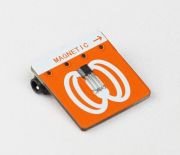
== 13. Magnetic Sensor == | == 13. Magnetic Sensor == | ||
This component senses magnets or magnetic fields. It’s perfect for invisible triggers or secret switches. Great for games, hidden interactions, or unlocking circuits using magnets. | This component senses magnets or magnetic fields. It’s perfect for invisible triggers or secret switches. Great for games, hidden interactions, or unlocking circuits using magnets. | ||
[[File:Proximity Sensor.jpg|thumb|180x180px|Proximity Sensor]] | |||
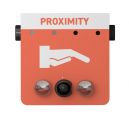
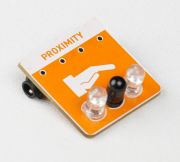
== 14. Proximity Sensor == | == 14. Proximity Sensor == | ||
The proximity sensor detects when something gets close—without touching. It’s like giving your project a sense of space. Kids can use it for motion-activated lights, alarms, or distance-based actions. | The proximity sensor detects when something gets close—without touching. It’s like giving your project a sense of space. Kids can use it for motion-activated lights, alarms, or distance-based actions. | ||
[[File:Motor Module 1.jpg|thumb|180x180px|Motor Module]] | |||
== 15. Motor Module == | == 15. Motor Module == | ||
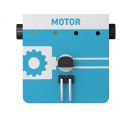
This module powers and controls the motor, managing speed or direction. It turns ideas into motion, whether it’s spinning a propellor or making something crawl. It introduces basic robotics and movement control. | This module powers and controls the motor, managing speed or direction. It turns ideas into motion, whether it’s spinning a propellor or making something crawl. It introduces basic robotics and movement control. | ||
[[File:DC Motor .jpg|thumb|180x180px|DC Motor]] | |||
| Line 320: | Line 389: | ||
== 16. Motor == | == 16. Motor == | ||
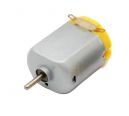
Once connected, this motor spins to bring projects to life with motion. Kids can use it for fans, spinners, or simple vehicles. It’s all about turning electrical energy into movement. | Once connected, this motor spins to bring projects to life with motion. Kids can use it for fans, spinners, or simple vehicles. It’s all about turning electrical energy into movement. | ||
| Line 333: | Line 405: | ||
== 17. Propellor == | == 17. Propellor == | ||
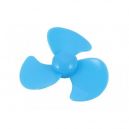
When attached to the motor, the propellor spins and moves air. It shows how mechanical movement can have real effects—like blowing paper or cooling things down. A great intro to simple machines. | When attached to the motor, the propellor spins and moves air. It shows how mechanical movement can have real effects—like blowing paper or cooling things down. A great intro to simple machines. | ||
| Line 341: | Line 418: | ||
== 18. Port Connector == | == 18. Port Connector == | ||
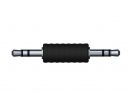
These connectors link modules securely and correctly. They make sure every piece is placed the right way, preventing mix-ups. Simple design, smart safety. | These connectors link modules securely and correctly. They make sure every piece is placed the right way, preventing mix-ups. Simple design, smart safety. | ||
| Line 349: | Line 431: | ||
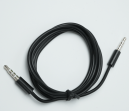
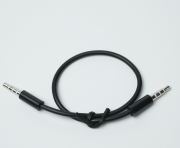
== 19. Port Cable == | == 19. Port Cable == | ||
These cables carry power and signals between components. Flexible and durable, they allow kids to build their circuits however they like. They’re the invisible wires that make everything work together. | These cables carry power and signals between components. Flexible and durable, they allow kids to build their circuits however they like. They’re the invisible wires that make everything work together. | ||
| Line 357: | Line 444: | ||
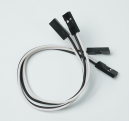
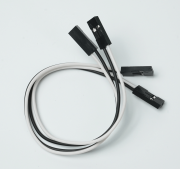
== 20. Jumper Cable == | == 20. Jumper Cable == | ||
Used for bridging gaps or custom routing, jumper cables offer more freedom in how components are connected. They let young makers experiment with alternate paths and layouts. Think of them as creative shortcuts. | Used for bridging gaps or custom routing, jumper cables offer more freedom in how components are connected. They let young makers experiment with alternate paths and layouts. Think of them as creative shortcuts. | ||
| Line 365: | Line 457: | ||
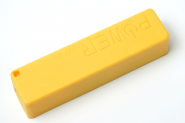
== 21. Power Bank == | == 21. Power Bank == | ||
A compact and rechargeable source of energy for the entire kit. It makes the setup portable, safe, and kid-friendly. No wall sockets needed—just plug in and go. | A compact and rechargeable source of energy for the entire kit. It makes the setup portable, safe, and kid-friendly. No wall sockets needed—just plug in and go. | ||
| Line 372: | Line 471: | ||
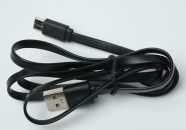
== 22. USB Type-C Cable == | == 22. USB Type-C Cable == | ||
Used to charge the power bank or connect to compatible devices. It’s modern, fast, and easy to use. One cable, many uses—just like in the gadgets they already know. | Used to charge the power bank or connect to compatible devices. It’s modern, fast, and easy to use. One cable, many uses—just like in the gadgets they already know. | ||
Revision as of 11:02, 28 April 2025
Introduction
The Playtrons Kit is a vibrant introduction to the world of electronics, thoughtfully crafted for young learners in Grades 1 to 3. Designed to turn curiosity into creativity, this hands-on kit brings early STEM concepts to life without the need for coding. It comes loaded with safe, child-friendly sensors and actuators, allowing kids to build simple circuits, trigger movement, light up LEDs, and engage in real-world problem-solving—all through intuitive play.
Our kits are made to spark wonder, and Playtrons does just that by encouraging kids to explore technology with confidence. Whether in a classroom, after-school program, or at home, this kit provides a rich, tactile learning experience that promotes critical thinking, exploration, and discovery. While select components can be simulated using our PLODE platform, the true joy lies in hands-on interaction, where every connection fuels imagination.
Built for repeat use and designed to grow with the learner, the Playtrons Kit serves as an ideal gateway into STEM education. It helps young minds develop foundational skills in a playful yet structured way—laying the groundwork for future innovators, one circuit at a time.
Overview
Welcome to Playtrons, your child’s first step into the exciting world of electronics through hands-on discovery and playful experimentation. The Playtrons Kit is a screen-free learning tool designed for young learners in Grades 1 to 3, offering a safe and interactive introduction to basic electronic systems.
Built around simple plug-and-play components like sensors and actuators, Playtrons encourages kids to explore how things work by physically connecting parts and seeing real results—lights blinking, buzzers buzzing, and more. There’s no coding involved, just pure tactile learning.
The kit also integrates with the PLODE platform, allowing optional simulation of certain components for guided exploration. Whether used at school or at home, the Playtrons Kit makes foundational STEM learning fun, approachable, and endlessly engaging.
What's Inside the Box:
Open the box of the Playtrons Kit and let the adventure begin! Designed for young thinkers and little tinkerers, this kit is the perfect introduction to the world of electronics and STEM. With easy-to-use components and no coding required, kids can jump right into building simple circuits and exploring how things work—all through hands-on play. The Playtrons Kit comes with everything needed to spark imagination and curiosity, laying a fun and solid foundation for early tech learning.
Hardware
The Playtrons Kit comes with a fun set of plug-in sensors and actuators that bring each project to life. These components connect easily using simple ports, letting kids explore how different parts work together to create exciting effects—like making a light turn on with a button press or triggering a sound with a motion sensor. Each connection adds a new layer of discovery, helping young learners understand cause and effect through play. With its mix-and-match design, the Playtrons Kit encourages creativity, making it easy to build unique, interactive creations with real electronic parts.
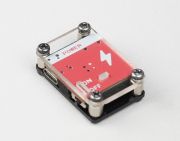
1. Power module
The power module is the heart of every project—it distributes energy to all connected components. It ensures safe and stable voltage, so kids can experiment without any worry. Just plug it in, and the fun begins.
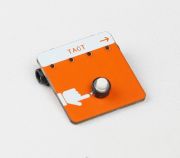
2. Tact Switch
This small button sends a quick signal only when pressed, making it great for creating reactions like lighting an LED or sounding a beep. It's perfect for introducing kids to momentary input controls. Tap, trigger, and see what happens.
3. Switch
Unlike the tact switch, this one stays on or off until you flip it again. It teaches children about persistent states in a circuit. Ideal for simple on/off functions and power control in mini-projects.
4. LED
The LED lights up when powered, making it a super satisfying and visual way to show electricity flowing. Kids can experiment with using LEDs as indicators or alerts. It’s bright, safe, and fun to use.
5. Junction
The junction is like a traffic circle for signals—it lets multiple wires or components connect to the same point. It allows more complex designs where one input controls several outputs. Think of it as a teamwork hub for electronics.
6. Beeper
This component emits a sound when triggered, which makes it great for alerts or interactive feedback. It’s a great way to make projects feel alive with audio responses. A buzz here and a beep there adds excitement.
7. Counter
The counter keeps track of how many times an event occurs, like a button press or sensor trigger. It's perfect for teaching the basics of event tracking and simple memory in electronics. Count, build, and measure behavior over time.
8. Graph
The graph module visually shows sensor data in a simplified form. It helps kids “see” changes in temperature, light, or proximity. A brilliant way to introduce data visualization without a screen.
9. Greater Than Condition Module
This smart module activates an output only when a sensor reading is greater than a set value. It’s a fun intro to logical comparisons—like “if it’s hotter than 30°C, turn the fan on.” Kids start thinking like engineers.
10. Less Than Condition Module
The opposite of the greater-than module, this one triggers when a reading is less than a chosen threshold. Great for projects like “if it's dark, turn the light on.” It encourages critical thinking and rule-based logic.
11. Light Sensor
This sensor detects brightness levels. Kids can build light-activated projects, like automatic nightlights. It helps them understand how devices respond to the environment—like eyes for your circuits.
12. Temperature Sensor
This sensor reads heat levels and lets learners build temperature-sensitive projects. It can be used for everything from “hot or cold” experiments to triggering fans or beepers. A cool way to learn about warm things.
13. Magnetic Sensor
This component senses magnets or magnetic fields. It’s perfect for invisible triggers or secret switches. Great for games, hidden interactions, or unlocking circuits using magnets.
14. Proximity Sensor
The proximity sensor detects when something gets close—without touching. It’s like giving your project a sense of space. Kids can use it for motion-activated lights, alarms, or distance-based actions.
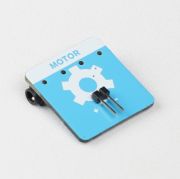
15. Motor Module
This module powers and controls the motor, managing speed or direction. It turns ideas into motion, whether it’s spinning a propellor or making something crawl. It introduces basic robotics and movement control.
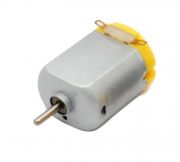
16. Motor
Once connected, this motor spins to bring projects to life with motion. Kids can use it for fans, spinners, or simple vehicles. It’s all about turning electrical energy into movement.
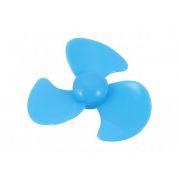
17. Propellor
When attached to the motor, the propellor spins and moves air. It shows how mechanical movement can have real effects—like blowing paper or cooling things down. A great intro to simple machines.
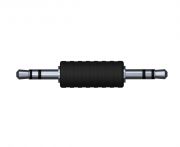
18. Port Connector
These connectors link modules securely and correctly. They make sure every piece is placed the right way, preventing mix-ups. Simple design, smart safety.
19. Port Cable
These cables carry power and signals between components. Flexible and durable, they allow kids to build their circuits however they like. They’re the invisible wires that make everything work together.
20. Jumper Cable
Used for bridging gaps or custom routing, jumper cables offer more freedom in how components are connected. They let young makers experiment with alternate paths and layouts. Think of them as creative shortcuts.
21. Power Bank
A compact and rechargeable source of energy for the entire kit. It makes the setup portable, safe, and kid-friendly. No wall sockets needed—just plug in and go.
22. USB Type-C Cable
Used to charge the power bank or connect to compatible devices. It’s modern, fast, and easy to use. One cable, many uses—just like in the gadgets they already know.
Building with Playtrons
Basic Projects
Starting with simple projects helps in understanding the components and their functionality.
- Star Projector
Explore LED module and a cardboard projector to create colorful light shows and cool visual effects.
Key Features:
- Watch how light shines through shapes to make star pictures on your wall!
- Create a mini star projector with just an LED and rolled-up cardboard!
- Change the colors and cut new shapes to design your personal night sky!
Advance Projects
After understanding the basics, more complex projects can be explored.
- Automatic Car break
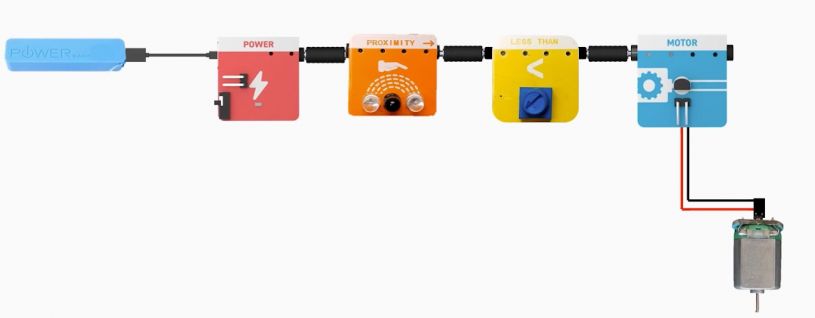
Explore the automatic car brake system using a proximity sensor, conditional module and motor.
Key Features:
- Discover how proximity sensors 'see' nearby objects like magic!
- Connect a sensor to a toy car's brakes - watch it stop automatically!
FAQs
1. How do I start using Playtrons?
Connect the USB Type-C cable to the power module. Plug the other end of the cable into a power bank. Turn on the power bank and flip the power switch on the module to start using Playtrons!
2. How do I use the simulation tool?
The simulation tool lets kids test ideas digitally before building. Open it on a computer/tablet, drag components, and connect them virtually to see how they work!
3. Is Playtrons safe for kids?
Yes! Components are child-safe, but adult supervision is recommended. Avoid using damaged power banks or cables.
4. Can I make a robot?
"Not a full robot, but you can build a ""smart fan"": Use the temperature sensor to spin the motor when it’s hot!"
